Podcasts, but tapes

As I dabbled in making a podcast app over the years, one design element I always wanted to include was a tape deck UI. The inspiration of course came from Apple’s own Podcasts app, back from the skeuomorphic days of iOS.

Podcasts’ tape deck UI on the iPad

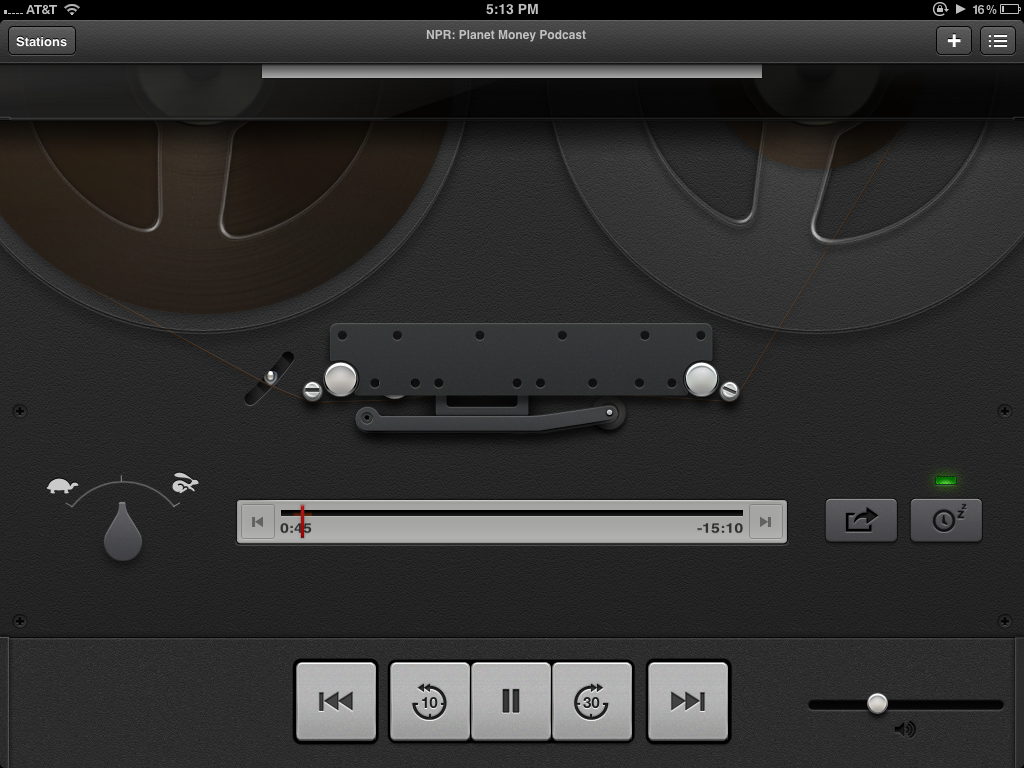
I loved that virtual replication of the tape deck. Watching the the spools spin, tape shrinking on the left and growing on the right. I remember being astounded when I noticed that tilting my iPod Touch would shift the reflection on the chrome knob of the volume slider. It was cool. I wanted to make something cool.

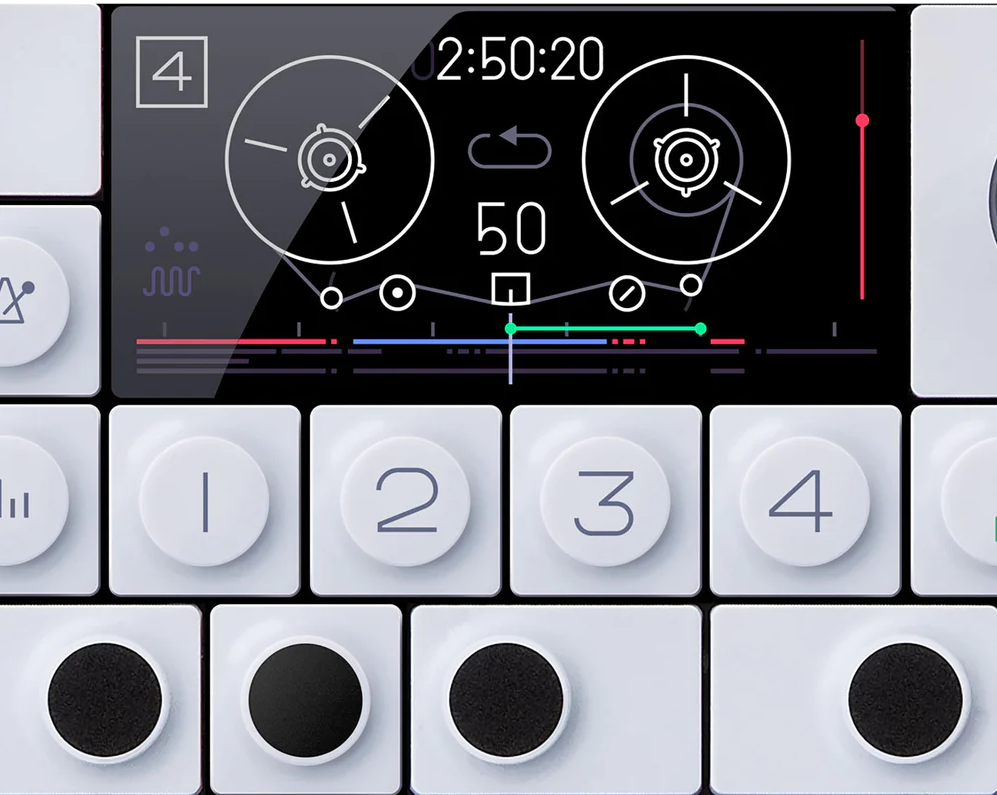
Graphic design being a skill I very much lack, I knew a skeuomorphic masterpiece like that would stretch beyond my ability. With realistic tape spools on the bench, I started looking into something more achievable. At first, I had the idea of using SpriteKit to make detailed, analogue representation of a podcast player in 2D pixel art. The user would browse through a cabinet of cassette tapes representing podcasts. Searching and subscribing would have a similar arcane and real-world analogue of an interface. Basically, a 16-bit game that was the interface to a podcast app. 😅 Obviously, this too was way beyond my skill. I finally came to my senses and decided to try something similar to the UI of Teenage Engineering’s OP-1. I loved the simplistic, striking line based interface of the little synthesizer and decided I would attempt to replicate it in my app.

OP-1 UI by Teenage Engineering

The minimal UI representation of a tape and meters seemed much more apporachable than the gradients and depth of skeuomorphism’s past. With my inspiration and goal set, I started watching Sketch tutorials and got to work.

OP-1 inspired prototypes

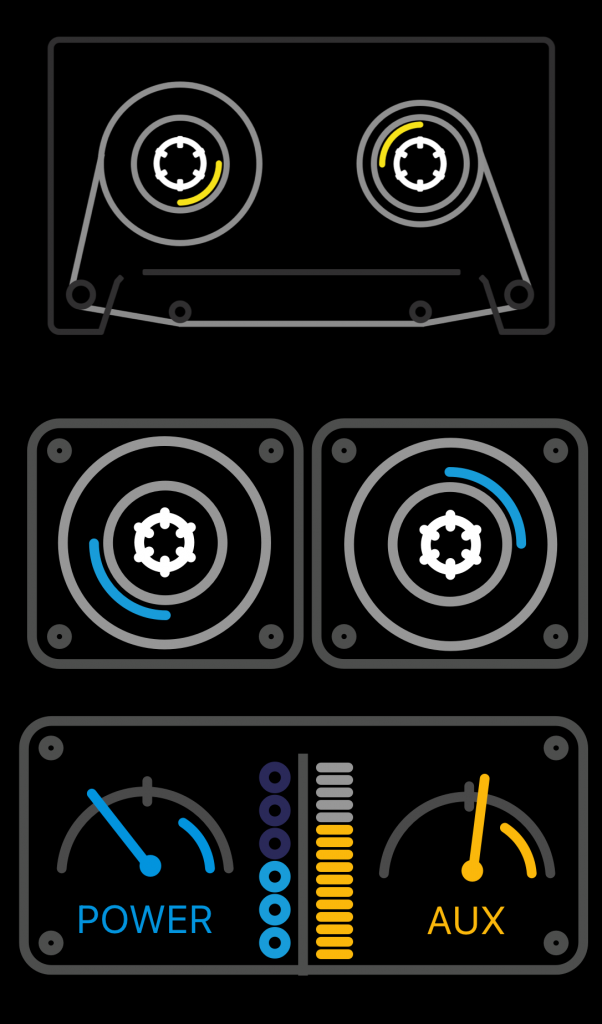
I replicated, and imitated, but I never quite ended up with something that was as cohesive and beautiful as the OP-1 interface. I was still happy with what I’d created. Though derivative, I learned how to use Sketch, I loved making the prototypes, I even got it working in Swift:

From Sketch to iOS!

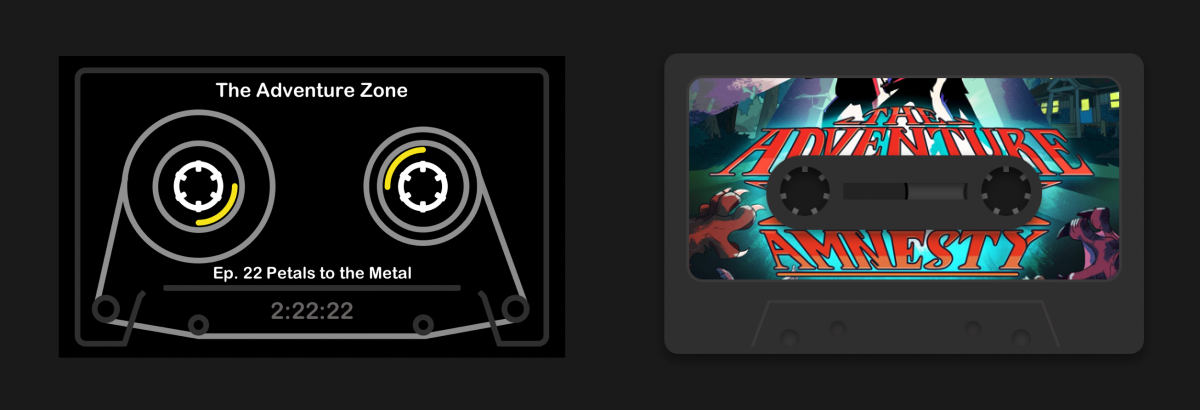
A couple years later, when the word “neumorphism” first started popping up on Twitter, I decided to make another go at designing the the case tape. While I fondly remembered my first attempts, they were too simple an imitation of a great design. This time, I decided I would do my own thing, and lean a (tiny) bit more into the skeuomorphic design of the original Podcasts app.

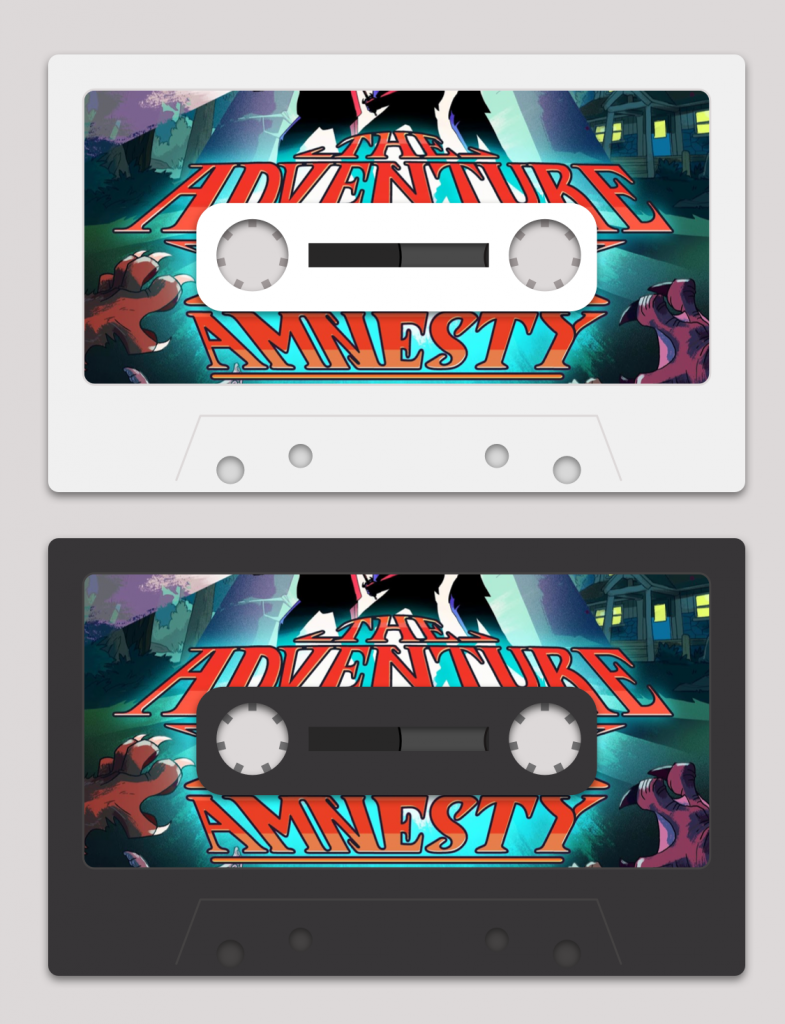
The new tape was still extremely simple. Again, I am no artist. My ability withstanding, I loved them. I still do, a few year later. I’m not sure how or even if I’d ever include something like them in an app in the future. My opportunities to do so are pretty limited. They make me happy though. Remind me of that original app from Apple. I hope more apps let whimsy design take the the stage.

Overriding Swift String’s Subscript Operator

UPDATE: The extension below always felt a bit dirty. There had to be a reason for the guardians of Swift not to provide simple access to characters via an integer subscript. In doing some research, I have found that I committed a terrible sin:

[As] simple as this code looks, it’s horribly inefficient. Every time s is accessed with an integer, an O(n) function to advance its starting index is run. Running a linear loop inside another linear loop means this for loop is accidentally O(n²) — as the length of the string increases, the time this loop takes increases quadratically.

Please forgive me.


With Swift 4, strings are once again a collection of characters. Maybe it’s my C++ upbringing, but an array of characters just feel right. Unfortunately, referencing a specific character in a Swift string isn’t as easy as using the subscript operator for an array. Instead of passing an integer into square brackets, iterating through the characters of a string requires the use of String.index. Simply writing myString[0] won’t work, we have to write:

let index = self.index(self.startIndex, offsetBy: (0))
mySelf[index]

I never remember this. Again, maybe it’s my C++ traumatized brain, but it just doesn’t sit right. So I made the equivalent of programatic comfort food with this little extension, overriding String’s subscript operator to accept a plain old Int:

extension String {
    subscript(i: Int) -> String {
        get {
            let index = self.index(self.startIndex, offsetBy: (i))
            return String(self[index])
        }
    }
}

And with that, myString[i] works and I don’t have to think too hard next time I reference a character.

Core ML and Vision for iOS

Apple showed off some spectacular tech demos throughout this year’s WWDC, particularly, those related to ARKit and it’s base framework Core ML. I’ve only dabbled with basic machine learning in the past (K Nearest Neighbor barely counts), and was intrigued at the amount of abstraction Apple provides in implementing computer vision, natural language processing, and working with custom models. After watching the Introducing Core ML session, I decided to get my hands dirty and create a little image recognition app fueled by machine learning.

Starting off was easy enough, after setting up a basic single page application with an UIImageView, a couple of labels, and a set of buttons, I picked a demo model (I went with Inception V3), and dragged it into Xcode 9. With the model in the project, all that was left was to reference the model, and have it make a prediction based on an image the user provides.

model
Once the model has been imported, clicking on the file in Xcode 9 will reveal details specific to the model, including what inputs and outputs. In the case of Inception V3, the model expects an image and will return a dictionary of labels and probabilities.

Using the model

let model = try VNCoreMLModel(for: Inceptionv3().model)
let request = VNCoreMLRequest(model: model, completionHandler: displayPredictions)
let handler = VNImageRequestHandler(cgImage: image.cgImage!)
try handler.perform([request])

These two code blocks are where the magic happens. Above, I referenced the model I imported, specify a completion handler, provide the image, and initiate the prediction.

Viewing predictions

func displayPredictions(request: VNRequest, error: Error?) {
   // Make sure we have a result
   guard let results = request.results as? [VNClassificationObservation]
   else { fatalError("Bad prediction") }

   // Sort results by confidence
   results.sorted(by: {$0.confidence > $1.confidence})

   // Show prediction results
   print("\(results[0].identifier) - \(results[0].confidence)%")
   print("\(results[1].identifier) - \(results[1].confidence)%")
   print("\(results[2].identifier) - \(results[2].confidence)%")
}

When the prediction request completes, the completion handler above is called, handling the results. I did a simple sort based on the confidence percentage provided by the model and displayed the top three results.

? Success: 98.32451%

Pretty dang easy. If you’d like to take a look at my example project, head on on over to GitHub.